Advanced Configuration
MailerQ can be configured using the "/etc/mailerq/config.txt" config file. Most of the variables and settings in this config file are discussed in separate articles. However, the following settings are not mentioned anywhere else:
max-delivertime:        86400
max-attempts:           0
retry-interval:         600,600,1800,1800,3600,3600,7200
server-id:              1
license:                /path/to/license.txt
user:                   username
lock: /path/to/lock.txtMost of the settings speak for themselves. A small overview.
Max deliver time
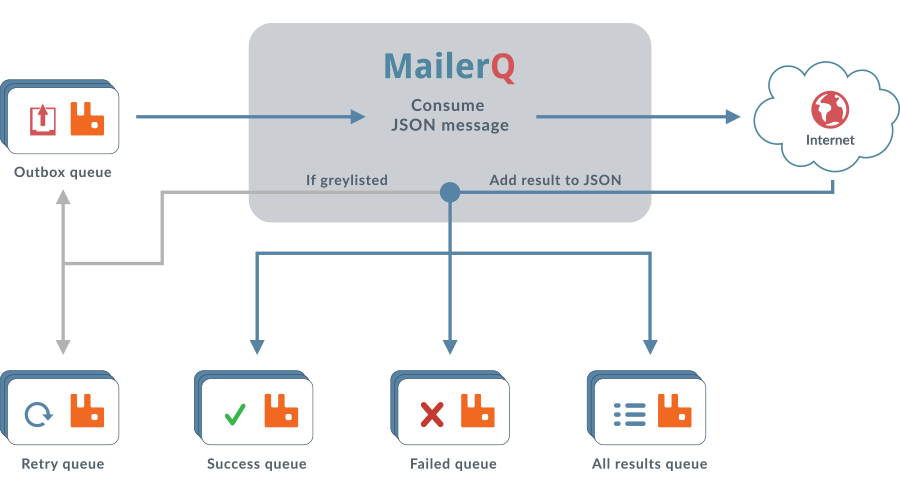
When a mail gets greylisted, or when there is an other type of soft failure, MailerQ reschedules the mail for later delivery. Inside the JSON data of each message you can add the optional properties "maxdelivertime" and "maxattempts" that instruct MailerQ how long it should retry to deliver the message, and when it should give up trying.
If you do not include these properties, MailerQ falls back to the "max-delivertime" and "max-attempts" config file settings. The "max-delivertime" variable holds the number of seconds MailerQ should keep on trying after the message was consumed for the first time. The "max-attempts" setting holds the total number of attempts before giving up.
You should normally set the "max-attempts" value to 0, meaning unlimited. MailerQ will then only give up after the number of seconds set in the "max-delivertime" variable, no matter how many attempts are made.
Retry interval
If a mail is published back to the outbox queue to be tried again, MailerQ uses the "retries" property in the JSON to find out how long it should wait for the next attempt. Because this setting is JSON based, it is possible for each message to have its own retry interval. This could be useful if you send both transactional as well as commercial mass mailings. For transactional emails you normally want small intervals because these mails should be delivered as soon as possible.
If the "retries" property is not set in the input JSON, MailerQ falls back to the setting from the config file. The config file variable "retry-interval" is used for that. This setting should hold a comma separated list of the delays between the attempts. This should be set to a number of seconds.
The default value is "600,600,1800,1800,3600,3600,7200". This means that the second and third attempt is sent 10 minutes after the previous attempt. The next two attemps use an interval of half an hour, then an interval of one hour for the next two attempts, and all subsequent attempts are sent after three hour intervals. You can change variable to anything you want.
Validate email addresses
By default, any injection method causes MailerQ to strictly check whether or not an email address is actually fully RFC compliant, and an error will occur if this is not the case. On SMTP injection, the message will simply be rejected, but on AMQP injection, the message will not be tried.
This can be loosened by the following properties.
validate-envelope:  loose   (default: strict)
validate-recipient: loose (default: strict)Setting these to loose causes the address to be interpreted as loosely as possible,
only requiring the @ sign in the middle and a valid domain on the right. The local-part
may be anything, and will not be restricted by the RFC any more. Note that although
attempts will be made, the other server might reject the message anyway, since it might
be in violation with the standard.
Server ID
Each message that is accepted by MailerQ gets a unique message ID. To prevent that two running MailerQ instances both assign exactly the same ID to a message, you can assign a "server-id" variable. This identifier guarantees that message ID's will never conflict.
server-id: 1License
To work properly, MailerQ needs a license file. The license file can be downloaded from the MailerQ website. You can store the file anywhere on the file system. The path to the license file can be configured by setting
license: <Path to your license> (empty by default)User
If you have configured MailerQ to use ports lower than 1024 (like port 25 for SMTP and/or port 80 for the management console), the MTA must be started as user "root". Once the ports have been opened, MailerQ changes its identity to the user set in the config file.
user: <user name> (empty by default)The username to change identity to after the SMTP and HTTP ports have been opened.
Proxy
To set a proxy for outgoing HTTP requests, the "proxy-server" variable can be used.
proxy-server: protocol://hostname:port (empty by default)Currently, two proxy types are supported, HTTP and SOCKS. For example, to route all HTTP
requests through an http proxy, the required uri would be http://example.org:8888, for a
proxy running on the host example.org on port 8888. For the SOCKS proxy, the URI would be
socks://example.org:8888 for a SOCKS proxy running on port 8888.
For the HTTP proxy, the proxy itself should support the CONNECT request. The HTTP proxy will be used as a tunnel, so this should be the case for both secure and insecure requests. The DNS gets resolved by MailerQ, so the final outgoing request will be similar to the request below.
CONNECT 1.2.3.4:80 HTTP/1.1Lockfile
To prevent that MailerQ starts more than once, MailerQ stores its process ID (pid) in a lockfile. The name and location of the lockfile can be set in the configuration file.
lock: <filename> (default: /tmp/mailerq.pid)User Statistics
MailerQ sends a message to Copernica hourly. This message contains some usage statistics
for that hour, e.g. the number of errors that occured. This information is used
to improve MailerQ. Users with a paid license can disable this message by adding
the heartbeat property to the config file:
heartbeat: false (default: true)