.NET/C# example
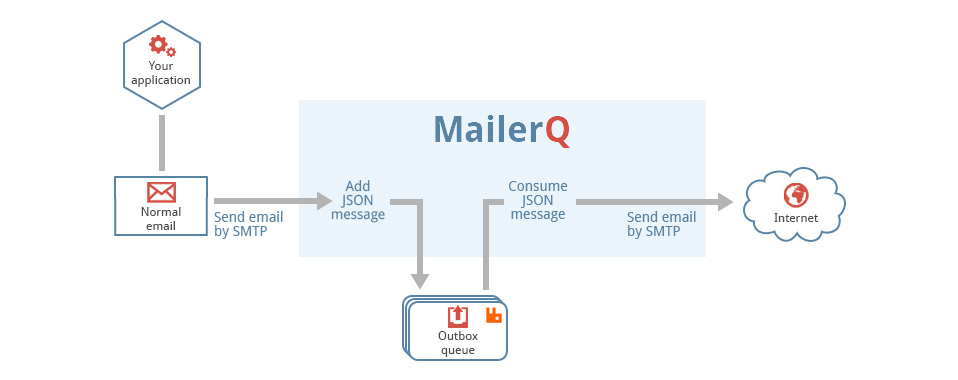
This example assumes that MailerQ is running and configured. It uses the .NET/C# AMQP client library provided by RabbitMQ.
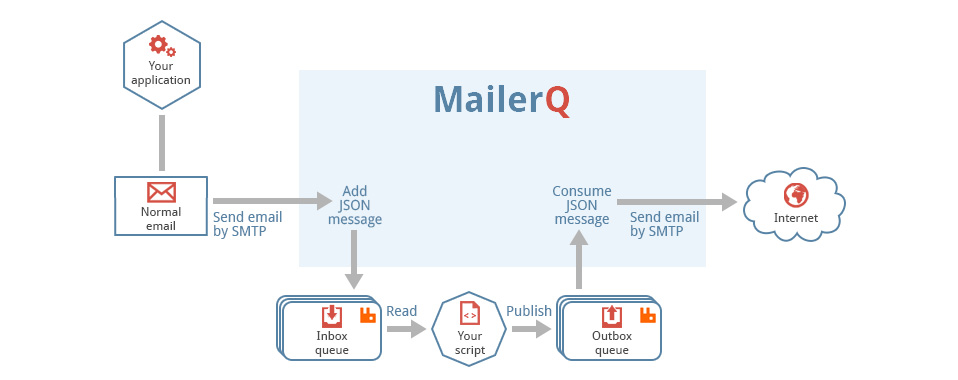
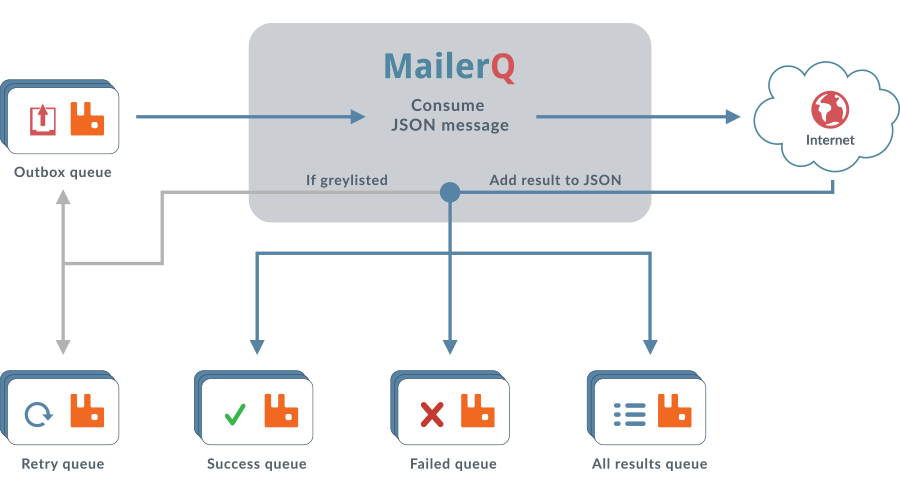
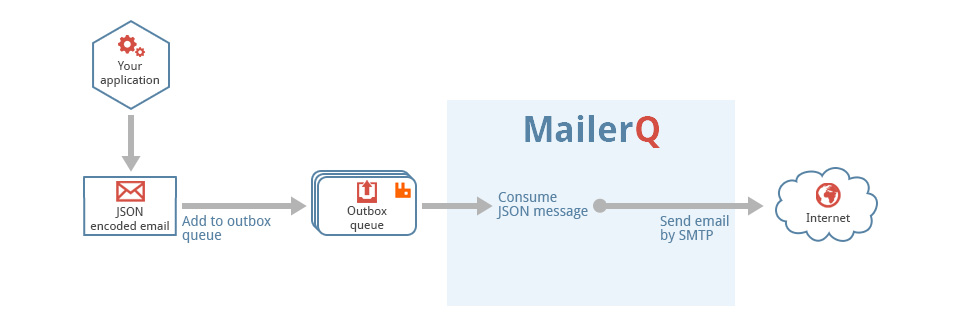
The .NET/C# example consists of two files; one that takes care of placing messages on the outbox queue and one that takes sent messages from the result queue.
Send
This class connects to RabbitMQ and places a JSON encoded message on the outbox
message queue. To connect to RabbitMQ and to create the JSON encoded message,
the program uses the private variables defined inside the class. If you want to
use the .NET/C# example to test your MailerQ configuration, you will have to run
the Send class before running the Result class.
Send.cs
// declare the namespaces
using System;
using RabbitMQ.Client;
class Send {
/**
* Settings for RabbitMQ
*/
// same as the rabbitmq-host option in the config file
private static string hostname = "localhost";
// same as the rabbitmq-user option in the config file
private static string username = "guest";
// same as the rabbitmq-password option in the config file
private static string password = "guest";
// same as the rabbitmq-vhost option in the config file
private static string vhost = "/";
// same as the rabbitmq-outbox option in the config file
private static string outbox = "outbox_test";
/**
* Settings for sending out the test email
*/
// domain where the test message should be delivered
private static string recipientDomain = "example.org";
// email where the test message should be delivered
private static string recipientEmail = "testmail@example.org";
// address where the email was sent from
private static string fromAddress = "this_is_my_email@my_domain.org";
/**
* Main method
*/
public static void Main()
{
// create the connection factory
ConnectionFactory factory = new ConnectionFactory();
// set the hostname of RabbitMQ
factory.HostName = hostname;
// set the user name to connect to RabbitMQ
factory.UserName = username;
// set the password to connect to RabbitMQ
factory.Password = password;
// set the virtual host to RabbitMQ
factory.VirtualHost = vhost;
// create the connection
using (IConnection connection = factory.CreateConnection())
// create the channel
using (IModel channel = connection.CreateModel()) {
// declare the queue
channel.QueueDeclare(outbox, true, false, false, null);
// put the domain inside the JSONMessage
string message = "{ "\"envelope\": \"" + fromAddress + "\", "
+ "\"recipient\": \"" + recipientEmail + "\", "
+ "\"mime\": \"" + "From: " + fromAddress + "\r\nTo: "
+ recipientEmail
+ "\r\nSubject: Example subject\r\n\r\n"
+ "This is the example message text\" }";
// get the byte array value of the message
byte[] mime = System.Text.Encoding.UTF8.GetBytes(message);
// publish the message on the outbox queue
channel.BasicPublish("exchange1", "key1", null, mime);
// send some output to the console
Console.WriteLine("Sent", message);
}
}
}
Result
This class connects to the RabbitMQ server and gets the messages that were
placed on the outbox message queue by the Send class back from the result
message queue. The result messages from the result queue are shown to the user.
The Result class can only output any relevant information, if it is executed
after the Send class was run. The Result program will keep running, waiting for
new messages until it is terminated (use Ctrl-C). You could run the Send program
from an other terminal, to test the effect.
Result.cs
// declare the namespaces
using RabbitMQ.Client;
using RabbitMQ.Client.Events;
class Result {
/**
* Settings for RabbitMQ
*/
// same as the rabbitmq-host option in the config file
private static string hostname = "localhost";
// same as the rabbitmq-user option in the config file
private static string username = "username";
// same as the rabbitmq-password option in the config file
private static string password = "password";
.NET/C#
// same as the rabbitmq-vhost option in the config file
private static string vhost = "/";
// same as the rabbitmq-outbox option in the config file
private static string resultbox = "results_test";
public static void Main() {
// create the connection factory
ConnectionFactory factory = new ConnectionFactory();
// set the hostname of RabbitMQ
factory.HostName = hostname;
// set the user name to connect to RabbitMQ
factory.UserName = username;
// set the password to connect to RabbitMQ
factory.Password = password;
// set the virtual host to RabbitMQ
factory.VirtualHost = vhost;
// create the connection
using (IConnection connection = factory.CreateConnection())
// create the channel
using (IModel channel = connection.CreateModel()) {
// declare the queue
channel.QueueDeclare(resultbox, true, false, false, null);
// start the consumer
QueueingBasicConsumer consumer = new QueueingBasicConsumer(channel);
// start the consumer
channel.BasicConsume(resultbox, true, consumer);
// message telling the user that the script is waiting for messages
// that will be placed on the result queue by MailerQ
System.Console.WriteLine("Waiting for messages." + "To exit press CTRL+C");
// keep waiting for new messages
while(true) {
// get a delivery from the result queue
BasicDeliverEventArgs ea = (BasicDeliverEventArgs)consumer.Queue.Dequeue();
// get the message from the result message queue as a
// byte array
byte[] data = ea.Body;
// convert the message into a string
string message = System.Text.Encoding.UTF8.GetString(data);
// write some output to the console
System.Console.WriteLine("Received:");
System.Console.WriteLine(message);
System.Console.WriteLine("------------------------------------------");
}
}
}
}
Putting it all together
Provided .NET/C# is working and you installed the .NET/C# AMPQ library in the
/lib/ directory, you can test your configuration as follows
Compile the code
$ gmcs -r:/lib/bin/RabbitMQ.Client.dll Send.cs
$ gmcs -r:/lib/bin/RabbitMQ.Client.dll Result.cs
Run the Send.exe file to put a message on the queue.
$ MONO_PATH=/lib/bin mono Send.exe
Run the Result.exe file to get the result messages from the result message queue.
$ MONO_PATH=/lib/bin mono Result.exe