JSON specification

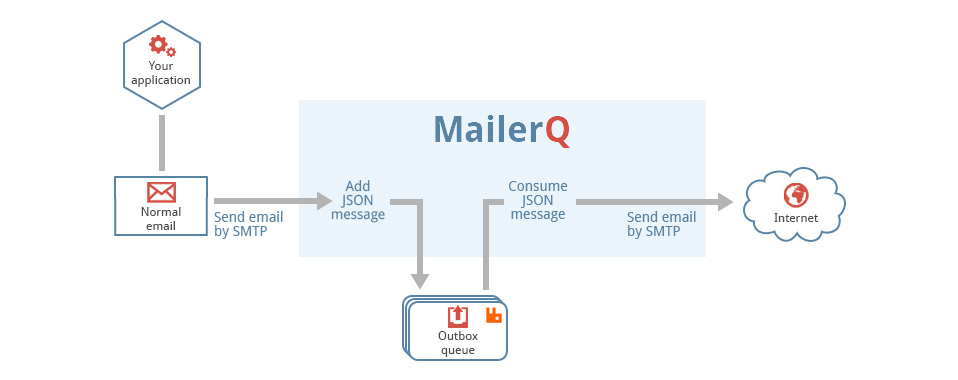
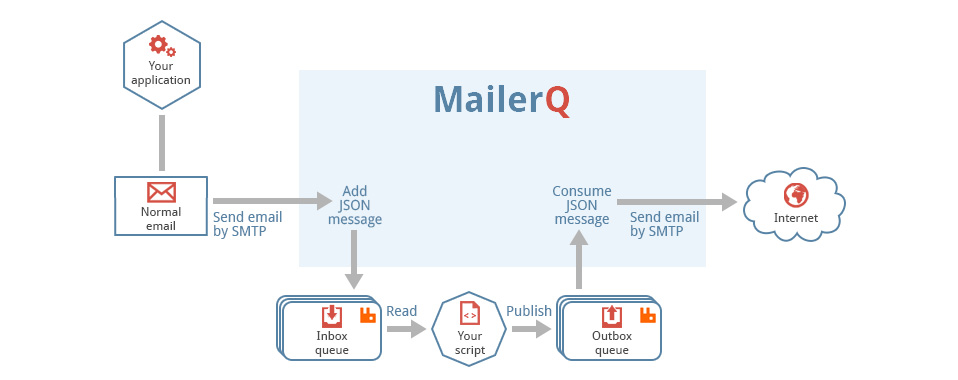
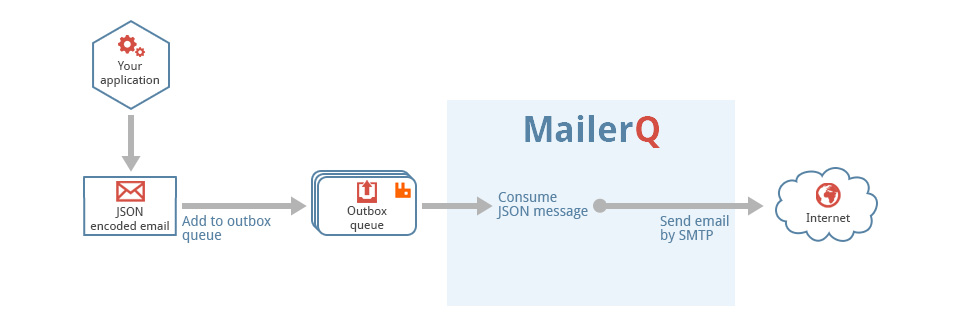
MailerQ expects all messages that are loaded from the RabbitMQ outbox queue to be JSON encoded. This means that if you want to inject email directly into RabbitMQ, you must use JSON. In this JSON you should set the envelope ("MAIL FROM") address, the recipient ("RCPT TO") address and the full mime data to be sent.

{
    "envelope": "my-sender-address@my-domain.com",
    "recipient": "info@example.org",
    "mime": "..."
}

Strictly speaking, the "envelope" property is not even required, because the SMTP protocol also permits deliveries without an envelope address ("MAIL FROM:<>"). However, without an envelope you cannot receive bounces, delivery status notifications and/or out-of-office replies.

To make the examples a little easier to read, we often remove the mime data from the example JSON, and replace it with "...".

Besides the three properties demonstrated above, you can add all other kind of other properties to the JSON object to control the delivery of the mail. The following properties are recognized by MailerQ:

envelope envelope ("MAIL FROM") address
recipient recipient ("RCPT TO") address
mime full mime data to be sent
key key to the mime data in external storage
keepmime do not remove mime data after delivery
data personalization data
ips ip addresses to send the message from
pool pool identifier to send the message from
nextattempt properties for when the next attempt should be
maxdelivertime time until which a delivery should be retried
maxattempts max number of delivery attempts
retries the delays between the delivery attempts
force force delivery, even when errors occur or conversion is impossible
inlinecss turn style blocks in html mails into inline style attributes
dkim private keys to sign the mail
dsn settings for delivery status notifications
queues alternative rabbitmq queues for results
smarthost smarthost settings
tags the tags to add to the message
headers add or change the mime headers
priority the priority of the message
security the security preference of the message

The basics

The most simple JSON to send to RabbitMQ contains just an "envelope", "recipient" and "mime" property as we demonstrated above. The "mime" property should be a string value, holding a valid MIME object. This mime object holds the entire email, including all the headers and possible text and html versions, attachments, and so on:

{
    "envelope": "my-sender-address@my-domain.com",
    "recipient": "info@example.org",
    "mime": "From: my-sender-address@my-domain.com\r\nTo: info@example.org\r\nSubject: ..."
}

However, the "mime" property can also be a nested JSON object, holding all individual properties of the mime, which will then be turned into a valid mime string by MailerQ:

{
    "envelope": "my-sender-address@my-domain.com",
    "recipient": "info@example.org",
    "mime": {
        "from": "my-sender-address@my-domain.com",
        "to": "info@example.org",
        "subject": "This is the subject line",
        "text": "text version of the mail"
    }
}

The number of properties that are supported inside the nested "mime" property is pretty huge. It uses the very same algorithm as the responsiveemail.com web service to convert JSON objects into valid MIME data. To give you an idea of a possible valid JSON input, consider this:

{
    "envelope": "my-sender-address@my-domain.com",
    "recipient": "info@example.org",
    "mime": {
        "from": "my-sender-address@my-domain.com",
        "to": "info@example.org",
        "subject": "Example subject",
        "text": "This is the example message text",
        "headers": {
            "x-my-special-header": "special-value"
        },
        "content": {
            "blocks": [ {
                "type": "image",
                "src": "http://www.example.com/logo.png"
            }, {
                "type": "button",
                "label": "Click the button!",
                "link": {
                    "url": "http://www.mailerq.com"
                }
            } ]
        },
        "attachments": [ {
            "url": "http://www.example.com/a-special-file.pdf",
            "name": "brochure.pdf"
        } ]
    }
}

The number of options is huge. You can construct responsive emails using images, HTML text, social media, et cetera. MailerQ downloads all the resources and converts the JSON code into a valid MIME strings.

For more information about the supported JSON properties nested under the "mime" property, check the responsive email documentation.

Storing messages in a message store

MIME bodies can become large, especially if your emails contain attachments or embedded content. To prevent that such big messages have to be processed by RabbitMQ, MailerQ can be configured to use an external message store (for example: MongoDB). You can then publish much smaller JSON objects to RabbitMQ, and keep the full MIME messages in the external message store.

MailerQ waits with loading the message from message store until the SMTP connection has been set up, so no time and resources are wasted on fetching information that is not needed. The mime data is only loaded when it is really needed.

With an external message store, you can use the "key" property instead of the "mime" property. This property holds the key under which the mime data is stored in your external storage system.

{
    "envelope": "my-sender-address@my-domain.com",
    "recipient": "info@example.org",
    "key": "message-store-key-where-data-can-be-found"
}

Even when you have a message store you can of course still use the "mime" property and store the full mime in the JSON. This is often even the recommended way of doing things, because most mails get delivered at the very first attempt, and storing-and-fetching the mail to and from external storage is then only a waste of time and resources. The message store is in such a setup only used for messages that were delayed and that are published back to RabbitMQ. MailerQ takes care of removing the mime from the JSON, and stores it in the message store when delayed messages are published back to RabbitMQ.

Tagging messages

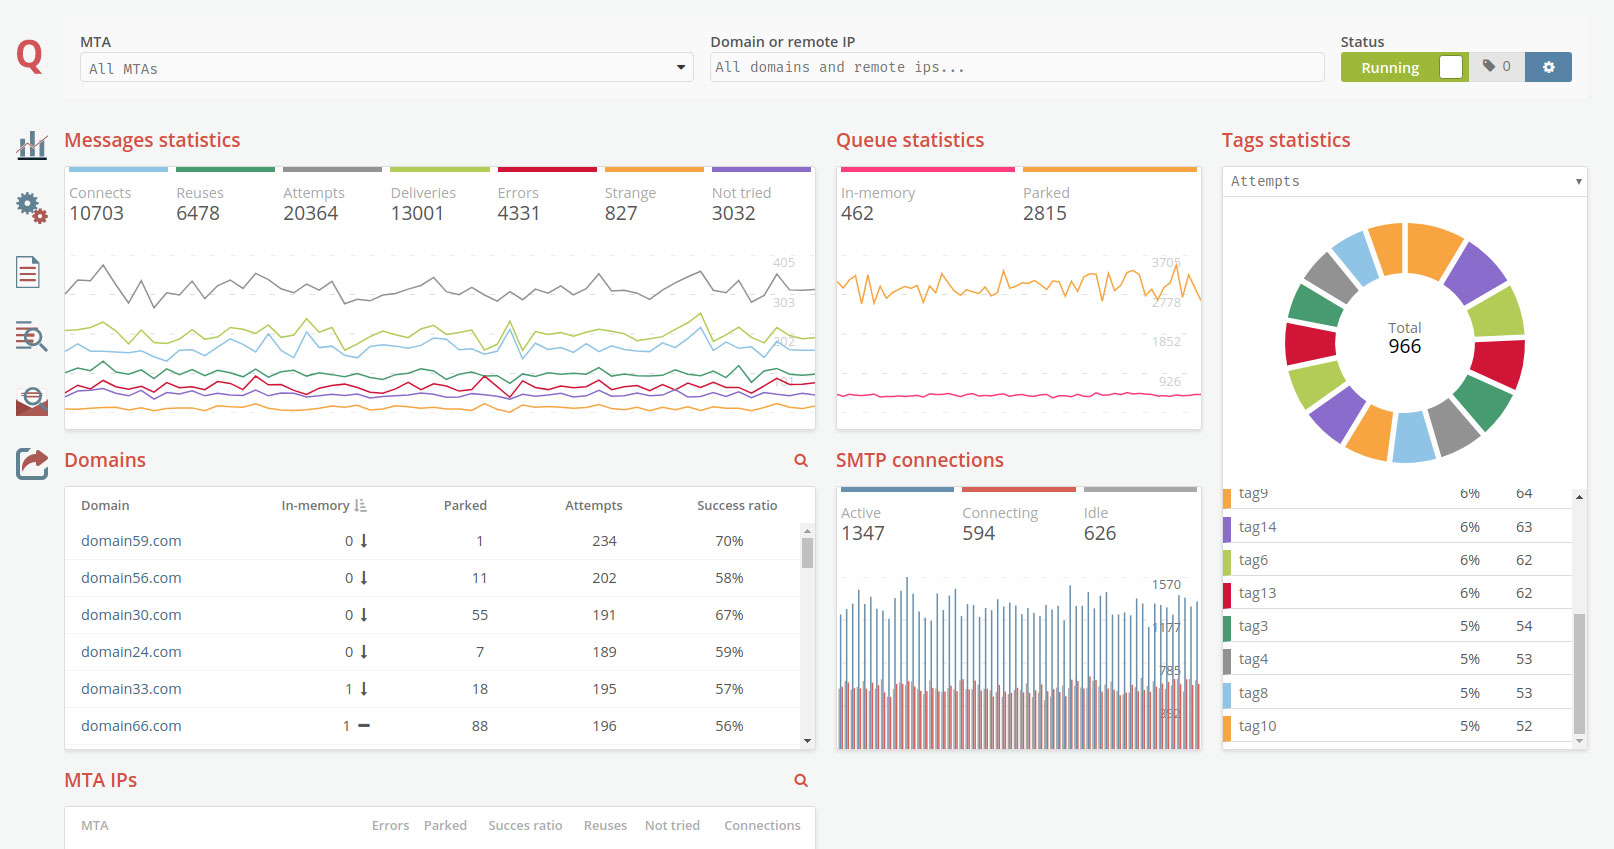
You may be injecting different types of messages into MailerQ, for example messages belonging to your various customers or campaigns. To help you get a better overview, MailerQ allows you to tag your messages with one or more labels of your choosing. These tags will show up in the management console, allowing you to monitor and control all deliveries belonging to a tag. To specify the tags in the JSON you can add a "tags" property with an array containing all the labels:

{
    "envelope": "my-sender-address@my-domain.com",
    "recipient": "info@example.org",
    "tags": ["Customer Name", "Example Campaign"]
    ...
}

This is just an example, you are free to add any number of tags to your messages and interpret them as you wish. There are virtually no restrictions on the format of a tag; all characters including punctuation and international characters are accepted in the tag specification as long as the message is valid JSON.

Keep messages after delivery

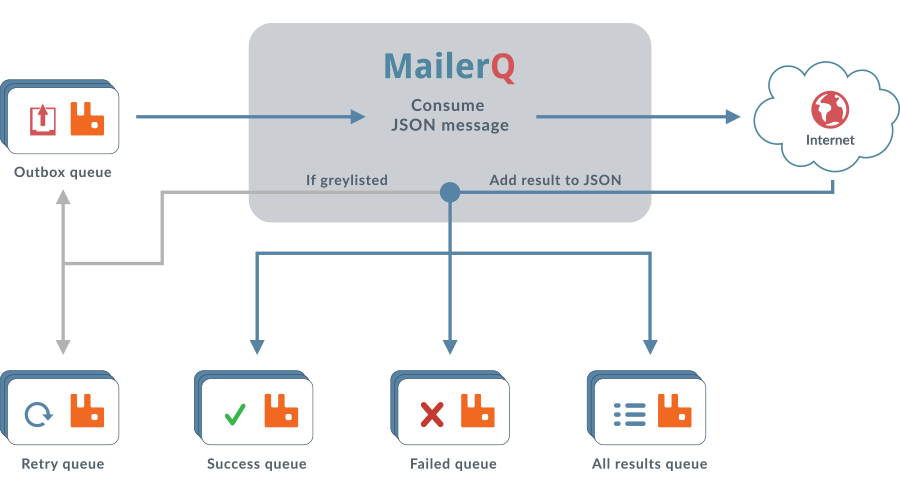
When a message has been completely processed - either because it was successfully delivered, or the delivery failed - MailerQ publishes the delivery result to the results queue, where you can pick it up for further processing.

By default, MailerQ throws away the mime data to make room in the JSON object and in the message store. The result queues only hold the meta data for each sent message, but not the full mime data. If you do not want the message data to be removed, you can indicate this by adding the "keepmime" option:

{
    "envelope": "my-sender-address@my-domain.com",
    "recipient": "info@example.org",
    "mime": "...",
    "keepmime": true
}

Personalization data

It is possible to include personalization data in the JSON. If you do this, MailerQ will treat the subject, html and text version of your email as templates, and replaces variables in it with the values loaded from the JSON.

{
    "envelope": "my-sender-address@my-domain.com",
    "recipient": "info@example.org",
    "mime": "From: ...\r\nTo: ...\r\nSubject: Message from {$firstname}\r\n...",
    "data": {
        "firstname": "Emiel",
        "lastname": "Bruijntjes",
        "email": "emiel.bruijntjes@copernica.com"
    }
}

Personalization variables can currently only be used for the subject and the text and HTML versions of the mail. However, if you assign a nested object to the "mime" property using the responsive email specification, you can use personalization data in almost all fields.

For more information about using personalization, check our personalization documentation.

Local IP addresses

MailerQ can send out mail from all IP addresses configured on your server and will always try to make as many connections as it takes to send out your mailing. This can be useful to increase the delivery rate, because receivers often restrict deliveries per IP address.

It is however wise to limit the range of local IP addresses that a mailing can use, as you may not want to expose all your IPs to every campaign or group of mailings you send. The reputation of your IPs is important for getting your mailings delivered, so you may not want to risk that a single dubious campaign greylists all your IP addresses. (Especially if these messages are provided by third parties) Setting a predetermined range in the JSON can help prevent these sorts of problems.

To limit the range of IP addresses that a specific mailing can use, you may specify an array of "ips" as a property in the JSON body:

{
    "envelope": "my-sender-address@my-domain.com",
    "recipient": "info@example.org",
    "mime": "...",
    "ips": ["231.34.13.156", "231.34.13.158"]
}

MailerQ will then only try to send the message from these IPs. Note that you can of course only use addresses that are actually bound to the host that MailerQ runs on. If the array provided is empty or if it only contains IP addresses that are not bound to your server, this will result in a failed delivery.

If no property "ips" is set in the JSON or if it is set to something other than a JSON array, MailerQ will fall back on a list of default IPs, which can be defined in the config with the property "smtp-defaultips":

smtp-defaultips:    1.2.3.4; 1.2.3.5; 1.2.3.6

If this property is missing or left empty, MailerQ will instead opt to use ALL available IP addresses on the host server. However, we do recommend recommend that you set this property if you have many IPs configured on your server.

IP Pools

Outside of being able to set single IP addresses, a pool can also be specified. First, setup an IP Pool in the Management Console and assign some IPs to the pool. Then, to set the pool, you may simply set the identifier in the json:

{
    "envelope": "my-sender-address@my-domain.com",
    "recipient": "info@example.org",
    "mime": "...",
    "pool": "example-pool"
}

MailerQ will then only use the IPs that are currently assigned to that pool. This way, if an IP performs poorly, it can easily be removed from the pool and MailerQ will no longer use it for the messages with the pool assigned, instead of having to rewrite every specific message to remove the IP where applicable.

Note that the pools are mutually exclusive with the IPs, that is, if the ips property is set in the JSON, the pool property will be ignored, as a specific set of IPs is more specific than a pool setting.

Delivery time

Messages loaded by MailerQ are delivered right away. If you want to delay a delivery, you can add a "nextattempt" property to the JSON with the desired time of delivery for the next attempt.

{
    "envelope": "my-sender-address@my-domain.com",
    "recipient": "info@example.org",
    "mime": "...",
    "nextattempt": {
        "time": "2019-01-10 00:00:00"
    }
}

In normal circumstances you want messages to be delivered right away, so you do not need this "nextattempt" property. However, under the hood, MailerQ uses this "nextattempt" property when a mail cannot be delivered because of greylisting. The message is then published back to the outbox queue with a "nextattempt" property set to a couple of minutes after the initial attempt.

This property is also set when Response Patterns cause a mail to be retried again after a specified interval.

Max delivery time and max attempts

When a message cannot be delivered immediately because of unresponsive receivers, greylisting or throttling, MailerQ publishes back the email to the outbox queue for later delivery. This can result in emails that are sent much later than the time that you first added them to the message queue.

If you do not want an email to be delivered after a certain time, all you need to do is add the "maxdelivertime" property. MailerQ will give up on delivering the mail after this time, and send a failure to the results queue.

{
    "envelope": "my-sender-address@my-domain.com",
    "recipient": "info@example.org",
    "mime": "...",
    "maxdelivertime": "2016-02-10 00:00:00",
    "maxattempts": 3,
    "retries": [ 600, 600, 1800, 3600 ]
}

The "maxattempts" is an alternative way to control after how many attempts MailerQ should give up trying. The "maxattempts" setting limits the number of attempts MailerQ makes before it gives up. You normally should not use this setting because "maxdelivertime" is much more precise.

Timestamps in MailerQ are always in UTC. MailerQ is not very tolerant in parsing timestamps, so make sure that you use the right formatting (YYYY-MM-DD HH:MM:SS). If you do not specify an explicit max delivery time or max attempts setting in the JSON, and a default value has also not been set in the config file, MailerQ will attempt to deliver the mail within 24 hours after the mail was first picked up from the outbox.

The "retries" property can be added to specify exactly how long MailerQ should wait until the next delivery of the mail. This should be set to a JSON array holding the number of seconds between the attempts. In the above example, the first and second retry are started 10 minutes after the previous attempt. If the third attempt (which is the second retry) fails too, MailerQ will wait half an hour (1800 seconds). If that attempt fails too, all subsequent attempts will be sent with one hour intervals (3600 seconds).

Inlinize CSS

When you send out HTML emails, you face the problem that not all email clients support stylesheets that are set in the header. Some email clients (especially web based clients) strip out the CSS code from the HTML header. This often messes up the layout and look of your messages. To overcome this, it is better not to set CSS settings in the header in the first place, but use "style=..." attributes in the HTML code.

MailerQ can do this automatically. If you set "inlinecss" property to true, MailerQ parses the HTML email, and converts the CSS code from the HTML header into inline "style=..." attributes in the HTML body.

{
    "envelope": "my-sender-address@my-domain.com",
    "recipient": "info@example.org",
    "mime": "...",
    "inlinecss": true
}           

DKIM Keys

You can include private DKIM Keys in the JSON to let MailerQ sign the mail.

{
    "envelope": "my-sender-address@my-domain.com",
    "recipient": "info@example.org",
    "mime": "...",
    "dkim": {
        "domain": "example.com",
        "selector": "x",
        "key": "-----BEGIN RSA PRIVATE KEY-----\n.....",
        "expire"   : "2017-01-01 00:00:00"
    }
}           

It is also possible to include multiple keys in the JSON. The "dkim" property supports arrays:

{
    "envelope": "my-sender-address@my-domain.com",
    "recipient": "info@example.org",
    "mime": "...",
    "dkim": [ {
        "domain": "example.com",
        "selector": "x",
        "key": "-----BEGIN RSA PRIVATE KEY-----\n....."
    }, {
        "domain": "example.com",
        "selector": "y",
        "key": "-----BEGIN RSA PRIVATE KEY-----\n.....",
        "expire"   : "2017-01-01 00:00:00"
    } ]
}           

Besides the private keys that you include in the JSON, MailerQ also keeps a set of private keys in its local database (and that can be edited using the management console). If there are multiple matching keys, they are all used for signing the mail.

By default, only regular headers are used for the signature: the "from" and "to" address, the "subject" and so on. If you want to include your own custom headers in the signature too, you can pass in an extra "headers" option:

{
    "envelope": "my-sender-address@my-domain.com",
    "recipient": "info@example.org",
    "mime": "...",
    "dkim": {
        "domain": "example.com",
        "selector": "x",
        "key": "-----BEGIN RSA PRIVATE KEY-----\n.....",
        "headers": [ "x-custom-header", "x-other-header" ]
    }
}           

The headers that you included in the "headers" option are also signed. This is especially useful if you want to include the "feedback-id" header in a signature. This "feedback-id" header is required to be signed for Google/Gmail feedback loops.

If you want to receive reports from remote servers whenever a DKIM signature fails to verify you can add a flag to the DKIM object to indicate this:

{
    "envelope": "my-sender-address@my-domain.com",
    "recipient": "info@example.org",
    "mime": "...",
    "dkim": {
        "domain": "example.com",
        "selector": "x",
        "key": "-----BEGIN RSA PRIVATE KEY-----\n.....",
        "report": true
    }
}

Note that you will have to update your DNS records with the options defined in RFC 6651 for the remote server to know where it should send their reports.

ARC

A DKIM key can also be used for creation of ARC signatures. This is enabled by setting the "protocols" option. This option should be an array of the protocols you want to use (DKIM and/or ARC):

{
    "envelope": "my-sender-address@my-domain.com",
    "recipient": "info@example.org",
    "mime": "...",
    "dkim": [ {
        "domain": "example.com",
        "selector": "x",
        "key": "-----BEGIN RSA PRIVATE KEY-----\n.....",
        "protocols" : ["dkim", "arc"]
    }, {
        "domain": "example.com",
        "selector": "y",
        "key": "-----BEGIN RSA PRIVATE KEY-----\n.....",
        "protocols" : ["arc"]
    } ]
}           

The first key is used for both DKIM and ARC signing, whereas the second key is only used for ARC signing.

Canonicalization

A DKIM can be signed using different forms of canonicalization. Default is relaxed/simple.

{
    "envelope": "my-sender-address@my-domain.com",
    "recipient": "info@example.org",
    "mime": "...",
    "dkim": [ {
        "domain": "example.com",
        "selector": "x",
        "key": "-----BEGIN RSA PRIVATE KEY-----\n.....",
        "canonicalization" : "simple/simple"
    }, {
        "domain": "example.com",
        "selector": "y",
        "key": "-----BEGIN RSA PRIVATE KEY-----\n.....",
        "canonicalization": "relaxed/relaxed"
    } ]
}           

In the example, the first key is signed with simple/simple canonicalization, and the second key is signed with relaxed/relaxed canonicalization.

Delivery Status Notifications

The "dsn" property can be added to control whether MailerQ should send back an email to the envelope address in case of a failed delivery.

{
    "envelope": "my-sender-address@my-domain.com",
    "recipient": "info@example.org",
    "mime": "...",
    "dsn": {
        "notify": "FAILURE",
        "ret": "HDRS",
        "orcpt": "info@example.org",
        "envid": "my-identifier",
    }
}

The above JSON contains a DSN setting that says that a delivery status notification should be sent back to the original envelope address in case of a failure (this is what the "notify" setting says). The notification should include the headers of the original mail (ret=HDRS). The notification should specify that the original recipient was "info@example.com", and the unique envelope identifier was "my-identifier".

For more information about delivery notifications, see the Delivery Status Notification documentation.

Custom result queues

After MailerQ has processed an email, it publishes the mail to one or more result queues. The default queues to use for this are configured in the global configuration file, but you can set other queue names to tell MailerQ to use other result queues.

{
    "envelope": "my-sender-address@my-domain.com",
    "recipient": "info@example.org",
    "mime": "...",
    "queues": {
        "results": "name-of-results-queue",
        "failure": "name-of-failure-queue",
        "success": "name-of-success-queue",
        "retry": "name-of-retry-queue",
        "dsn": "name-of-dsn-queue"
    }
}

All properties inside the "queues" object are optional. If you leave an option out, MailerQ will use the default queue from the config file. If you include a queue but set it to a null value, the queue will not be used. Thus, if you for example want to process only the errors for a certain e-mail, you can only set the "failure" queue, and set all other queues to null. When the delivery succeeds, MailerQ will silently discard the mail, without adding it to any result queue:

{
    "envelope": "my-sender-address@my-domain.com",
    "recipient": "info@example.org",
    "mime": "...",
    "queues": {
        "results": null,
        "failure": "name-of-failure-queue",
        "success": null
    }
}

There is an important difference between not mentioning a queue in the "queues" object, and setting it to null. In the above example, the "dsn" and "retry" queues are missing from the "queues" object. This means that for these two queues the setting from the config file will be used (set with the "rabbitmq-dsn" and "rabbitmq-retry" options). For the "results" and "success" queues a null parameter was used, so that the settings from the config file are ignored, and no messages are ever published to the results or success queues.

Smarthost settings

If you do not want to send the message right to the recipient right away, but to an alternative SMTP server on the internet, you can add a "smarthost" option.

{
    "envelope": "my-sender-address@my-domain.com",
    "recipient": "info@example.org",
    "mime": "...",
    "smarthost": {
        "hostname": "mail.smtpeter.com",
        "port": 25,
        "username": "my-username",
        "password": "my-password"
    }
}

The above message will not be sent to "example.org", but to "mail.smtpeter.com" instead.

Changing the MIME headers

MailerQ can be used to alter the MIME headers. To do so, you can add a "headers" option.

{
    "envelope": "my-sender-address@my-domain.com",
    "recipient": "info@example.org",
    "mime": "From: ex@ex.com\r\nTo: info@ex.com\r\nDummy: xyz\r\nSubject: ...",
    "headers": {
        "remove" : ["dummy", "bcc"],
        "prepend" : {
            "cc" : "cc@ex.com",
            "x-example" :  ["example 1", "example 2"]
        },
        "append"  : ...,
        "replace" : {
            "from" : "xe@xe.com"
        }
        "update"  : ...,
    }
}

The "remove" property can be a string or an array of the header fields that have to be removed from the mime. Using the "prepend" option one can prepend headers to the mime. Multiple headers with the same key can be prepended by supplying an array of values. The "append" (or "add") option holds the headers that have to appended (same syntax as prepend). The headers described in "replace" will replace the first occurrence and remove the other headers with the same key. If no existing header is found, it will simply be appended. The "update" option works similar, but it non-existing headers will not be appended.

Priority

To give the message a priority, the priority field should be used. This setting will only have an effect if the rabbitmq-maxpriority is set in the config file, since the queues will then be constructed as priority queues.

Security

Since MailerQ 5.12, emails themselves can now also be given a security value. There are 4 different values for this field.

optional the message will make use of whatever is available, and will not specifically use STARTTLS
opportunistic the message will use STARTTLS if it is available, but otherwise sends over an unsecured connection
required a secure connection is required for the message to be sent
verified the connection has to be secure, and the certificate and cipher have to match the email domain

For example, the following email will require an SSL connection to be set up to the remote server. Do keep in mind that this is only for the first hop; as there is no standard for setting this property on emails, if the message is transferred from the other server to its final destination, there is no way to enforce it being done over a secure connection.

Setting custom message properties

To have better control over your message queue, you can add additional properties in the JSON. These properties are ignored by MailerQ, but they will end up in the result queue, and allow you to link result data with the original mail.

{
    "envelope": "my-sender-address@my-domain.com",
    "recipient": "info@example.org",
    "custom-property-name": "debug data",
    "mime": "..."
}