MailerQ AmqpPickup
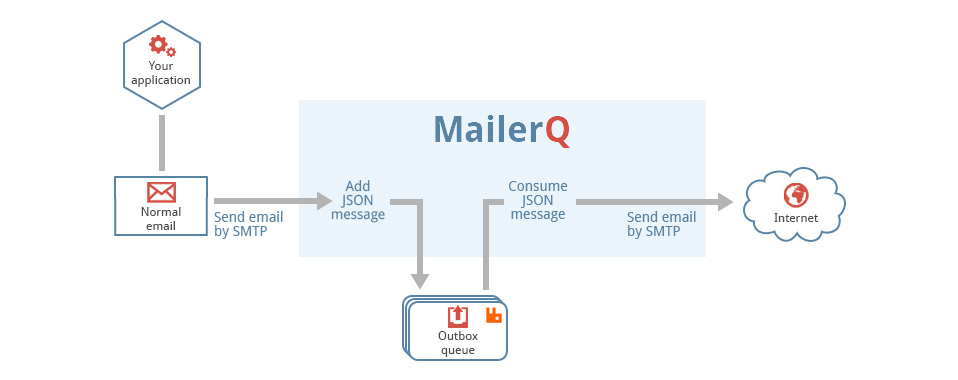
This is a generic tool that reads files from a directory, called the pickup directory, and publishes them as-is, with no extra processing to a RabbitMQ message queue. It is typically used in a technology stack together with MailerQ, where this tool publishes messages to the outbox that MailerQ uses to send messages from.
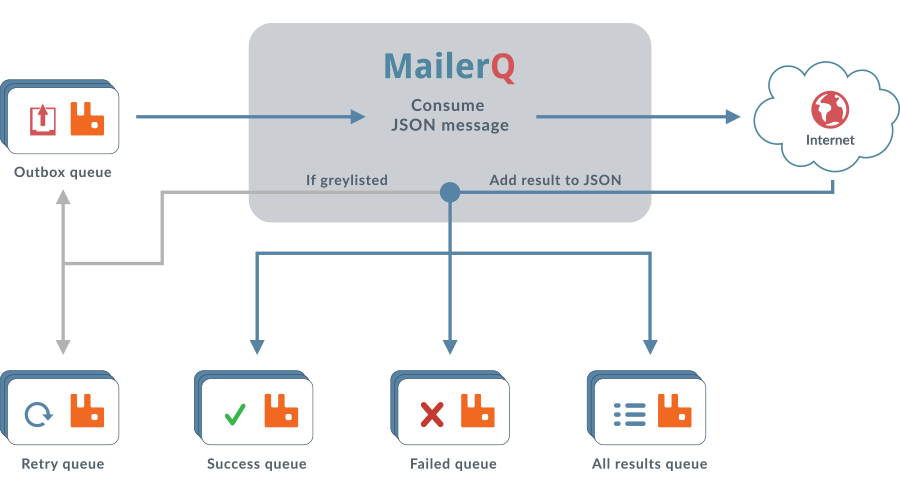
Filesystem --> AmqpPickup --> RabbitMQ --> MailerQ --> Recipients inboxesIt is important to note that this can not be directly connected to MailerQ yet. It currently needs some custom middleware to convert the published message into the JSON format that MailerQ can read.
Installation
The application is stored in our APT repository. If you have already enabled our APT repository, you can install it with this command:
sudo apt install mailerq-amqppickupRunning
You typically run this program from the command line. It reads all its input from a config file stored in /etc/copernica/amqppickup.txt.
amqppickupConfiguration
All options can be supplied in the system wide config file, via environment variables and as command line options. The config file is stored in /etc/copernica/amqppickup.txt. Options from the config file can be overridden by passing them as command line arguments or environment variables. The "rabbitmq-address" setting, for example, can be provided in the following ways:
- the setting "rabbitmq-address" in the /etc/copernica/amqppickup.txt config file
- the command line argument "--rabbitmq-address"
- the environment variable "AMQPPICKUP_RABBITMQ_ADDRESS"
We use "rabbitmq-address" as an example. All configuration settings can be supplied in a similar manner.
Supported options for RabbitMQ
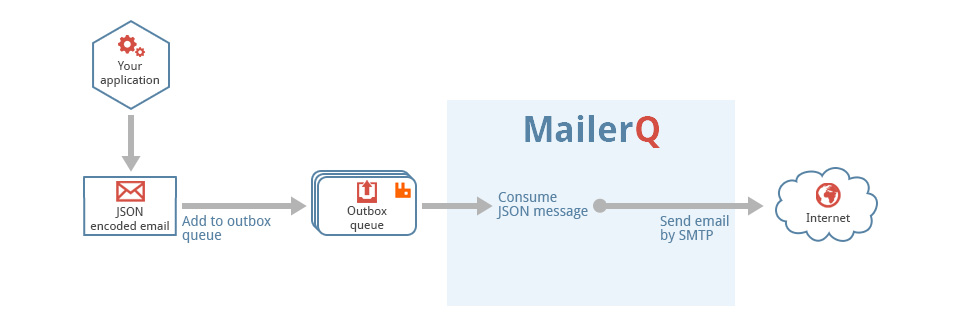
The application reads files from a specified pickup directory, and publishes them to the specified output queue, where they can be picked up by MailerQ.
rabbitmq-address: the address in amqp://user:password@hostname/vhost format.rabbitmq-output: the name of the queue to which messages are published.
The value of rabbitmq-output can also be formatted as "exchange:routingkey".
If you use this format, all messages published to the specified exchange with
the specified routing key are consumed.
Pickup options
The application reads files from a specified pickup directory. With the following options you can control this behaviour:
directory: the path to the directory where files will be read from.remove: whether files be removed after consumption.open-files: the number of files that will be processed simultaneously.scan-interval: the interval (in milliseconds) between scanning the pickup directory. This is only useful for filesystems that do not support inotify.