Email Throttle Schedules is a functionality in MailerQ used for warming up IP addresses. When you put a new IP address into operation for sending, mailbox providers will initially be hesitant to accept large volumes of email from it. It is therefore important to gradually increase your sending speed and volume, a process also known as IP warm-up. This process allows mailbox providers to identify you as a legitimate sender. Warming up an IP address will minimize deliverability issues and maximize the results of your email campaigns. This warming up can easily be done with Email Throttle Schedules.
MailerQ IP warm-up is a two-step process using features Email throttles and Email Throttle Schedules. MailerQ allows you to set a pattern of which IPs to which ISPs you want to warm up as well as set a specific schedule. There can be a lot of different ways to specify your schedules, for example, for general use, for a certain ISP, an exponential warm-up schedule, a linear schedule etc. These schedules can be reused and changed for every new IP address that you are adding according to your needs and requirements.
Once you successfully go through setting up Email Throttle Schedules, MailerQ will recognize the patterns and steps you created and start sending. The schedule day parameter will be incremented once per day for every combination of an IP to a domain it has sent that day. That means that day 1 starts when the specific messages match the pattern combination (IP to ISP) and will move to the next scheduled step only once actual messages have been sent out. If you don't send any messages on a certain day, the schedule will not advance to the next step.
First, we'll have to figure out what an appropriate IP warm-up plan is for the ISPs we're creating a warm-up plan for. We'll need to know how long warming up a cold IP address at a certain ISP takes, and how your sending volume should increase over that period of time. In this tutorial, we'll go with a dummy plan that is not per se usable in real-life scenarios. For smaller mailbox providers and as a fallback plan, we recommend creating a default schedule. MailerQ's team of Deliverability Experts is happy to assist in figuring out the right warm-up plans.
EXAMPLE ONLY: Exponential IP warm-up schedule for 30 days, increasing the throttles every 5 days:
Once we know how to warm up our cold IP(s) at a certain ISP, we'll have to create new Email Throttles for each step/increment (for this example day 1-4, day 5-9, day 10-14, and so on). We will need to create 7 Email Throttles. Make sure to not specify a pattern in these Email Throttles. An advanced description on how to use Email throttles can be found here.
In the MailerQ Management Console:
 Image 1: Email throttle: Exponential IP Warmup Schedule - Day 1
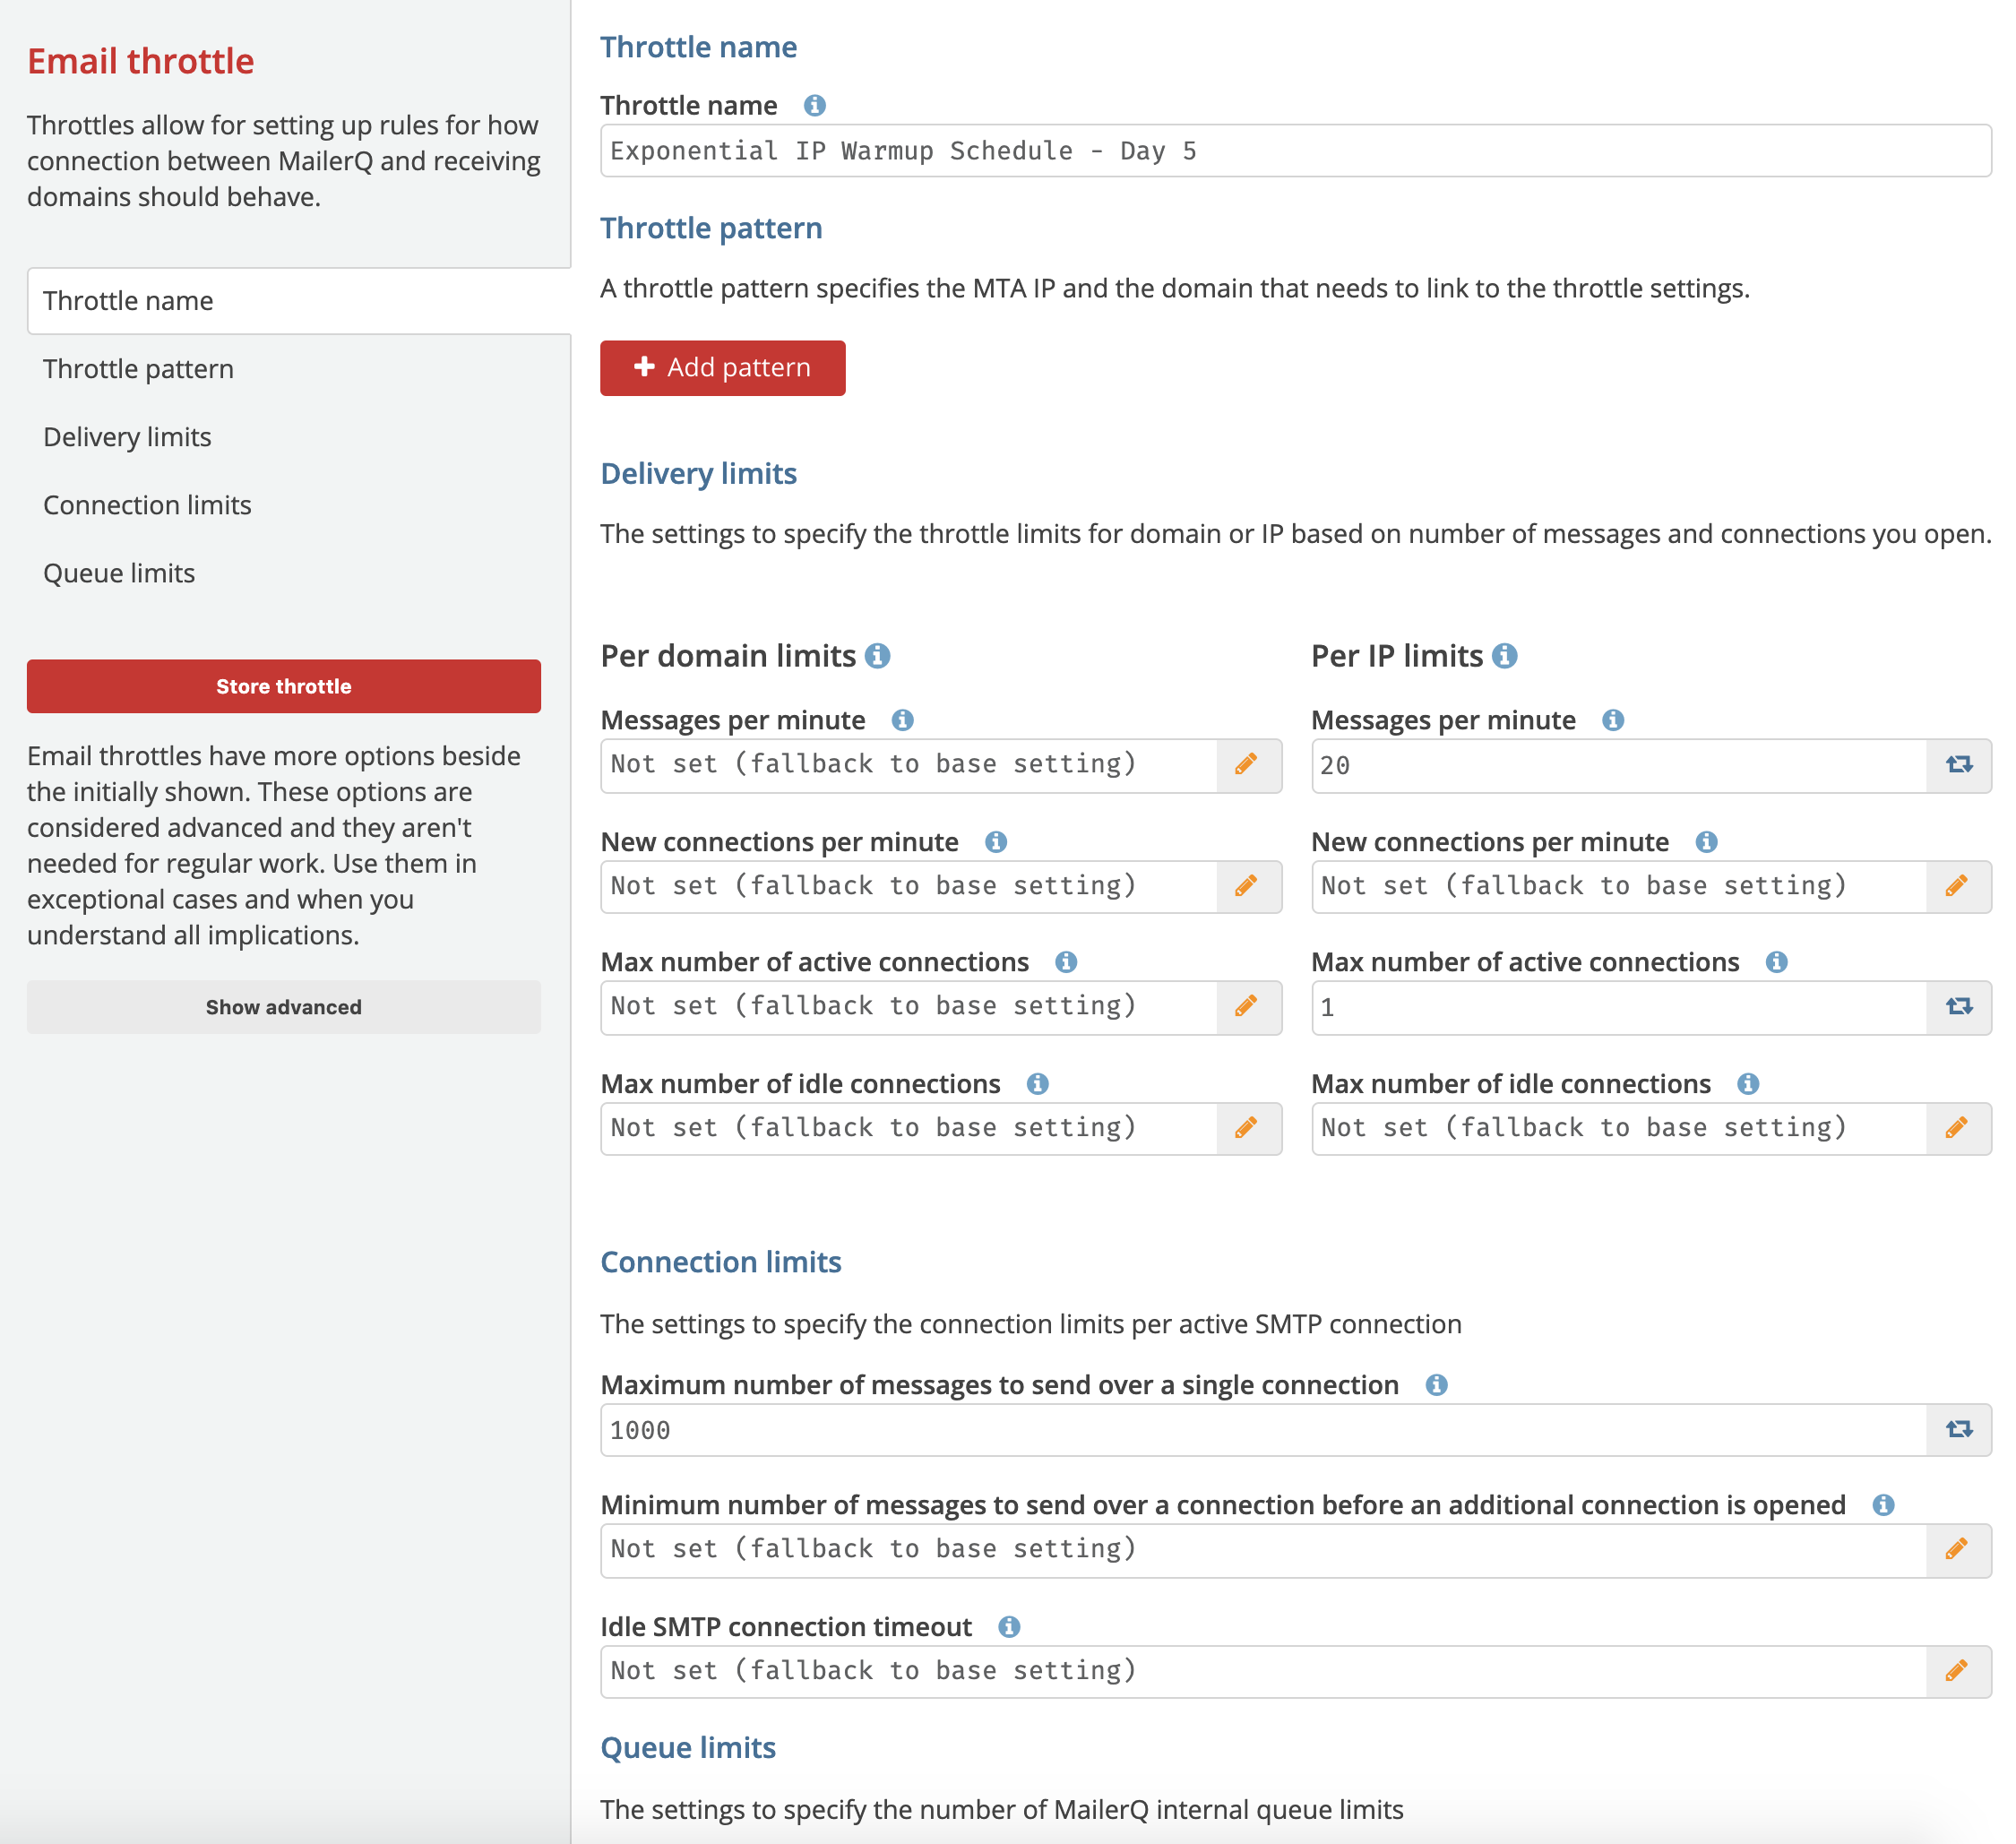 Image 2: Email throttle: Exponential IP Warmup Schedule - Day 5
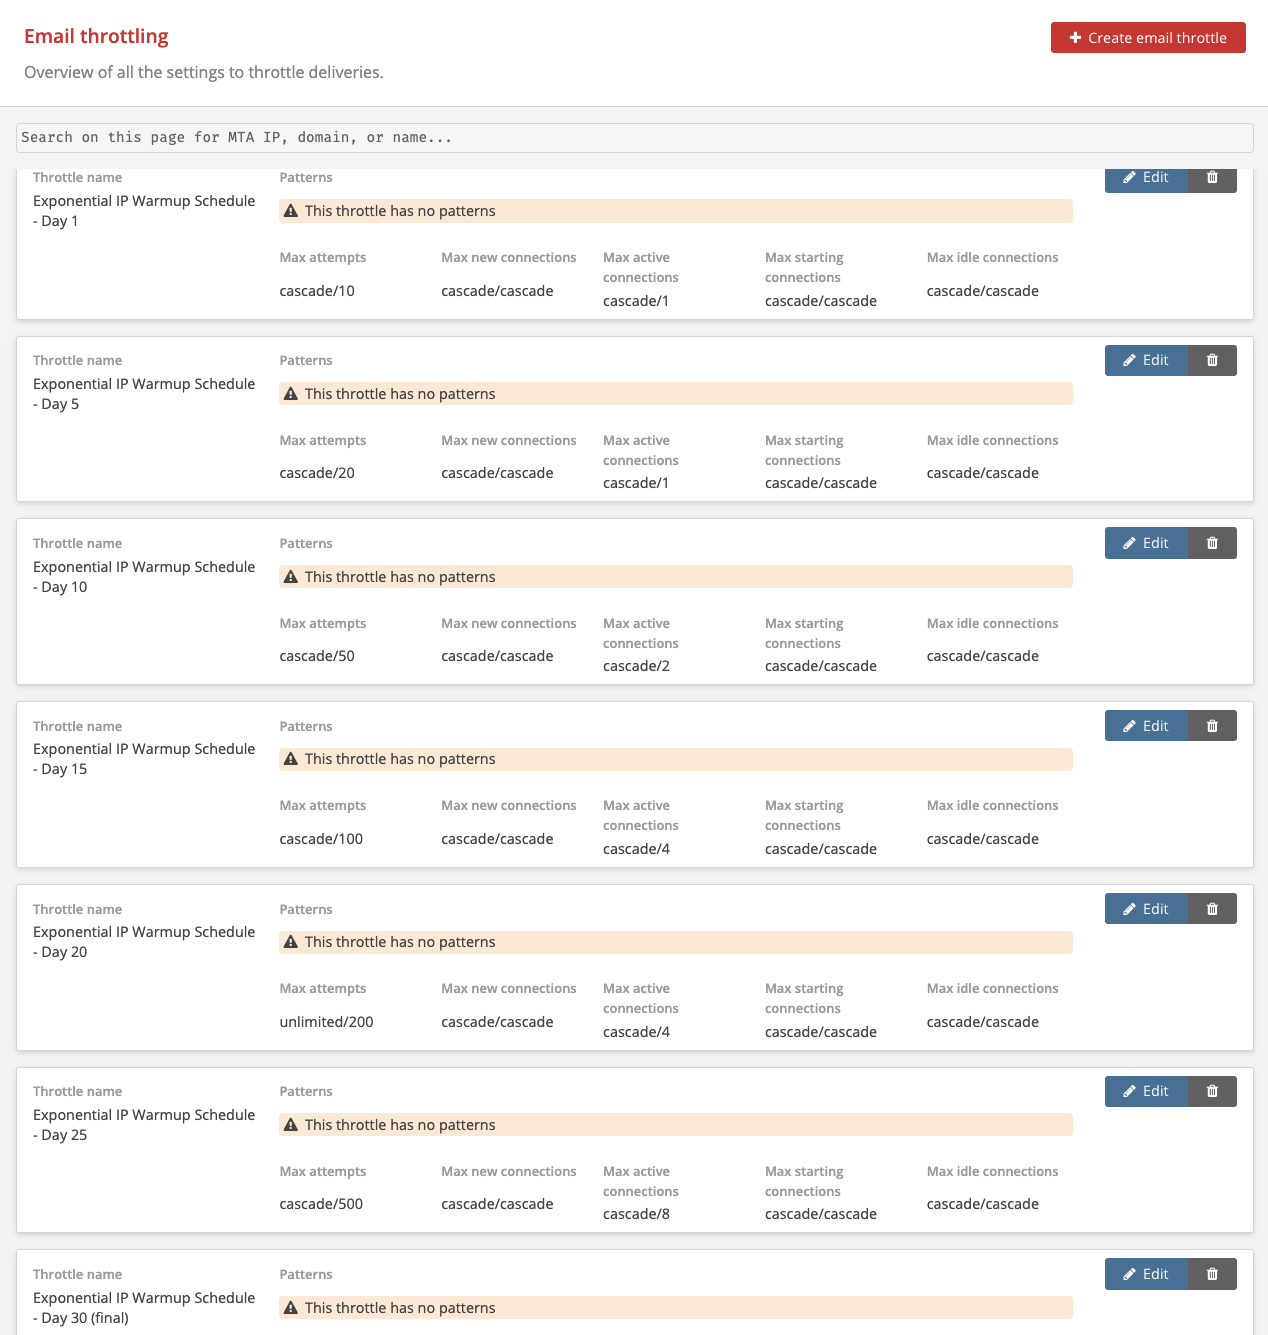 Image 3: Seven Exponential IP Warmup Email throttles
Now that we have our warm-up schedule set up, we want to try it out with a cold IP address. You can easily instruct MailerQ to warm up a new IP address using a certain schedule.
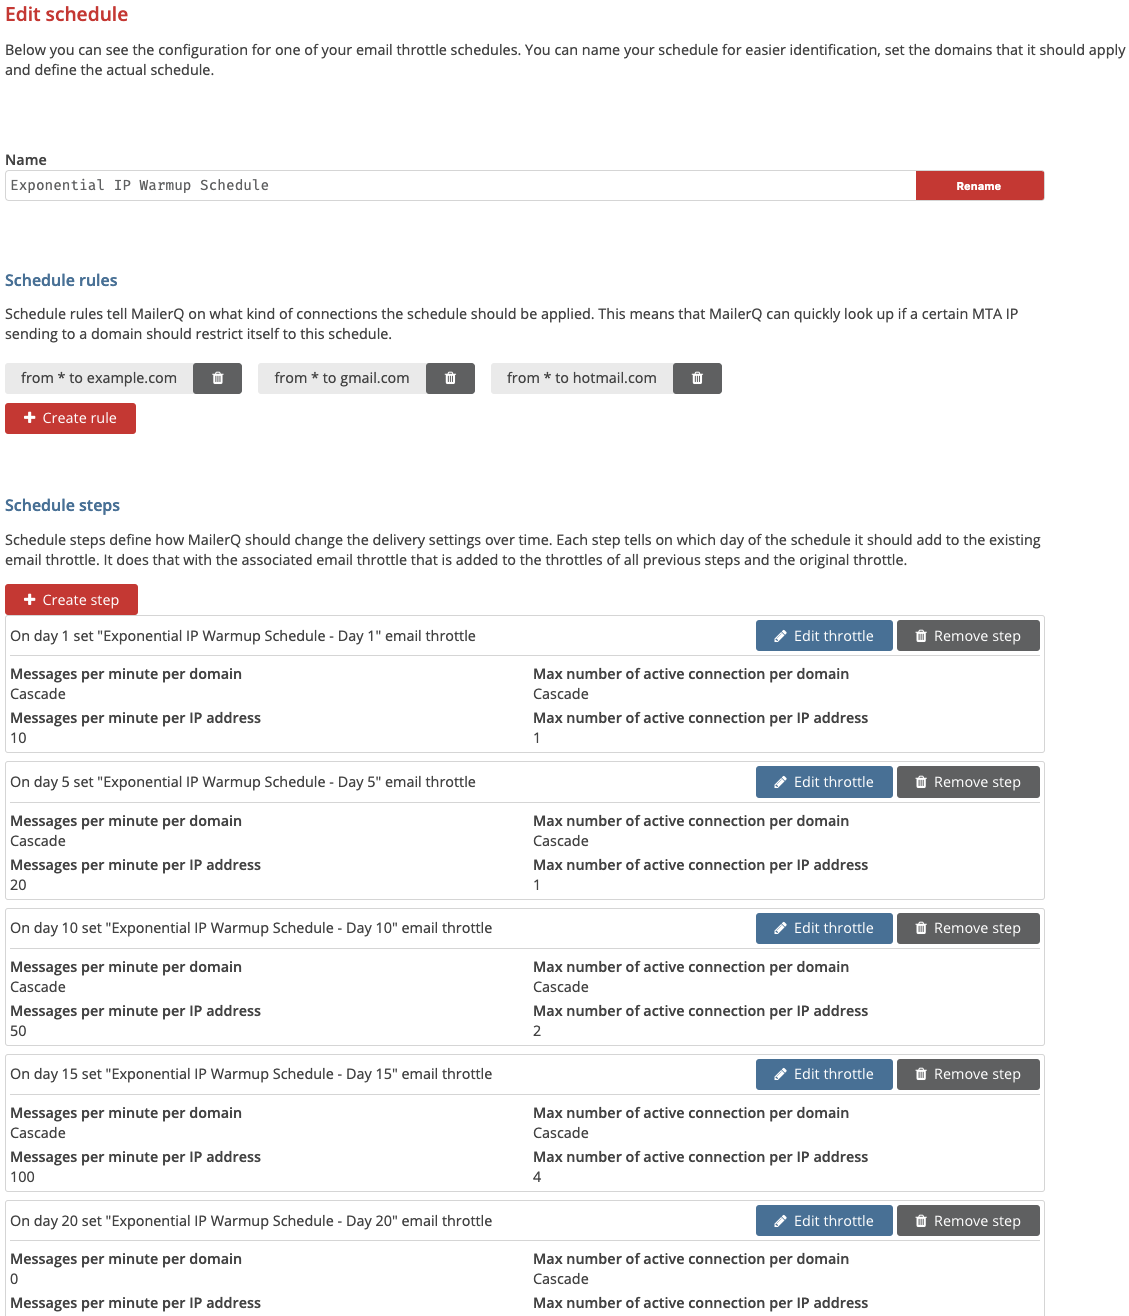 Image 4: Seven Exponential IP Warmup Schedules - Day 1,5,10,15,20,25 and 30
At the end of the schedule the specified IPs will remain on the last determined Email throttle capacities. At this point you could either determine the last step to be matching the capacities specified by ISPs or you could move the IPs over to your other email throttle rules.
For questions and suggestions on the specific use case of Email Throttle Schedules, feel free to reach out to one of our experts via info@mailerq.com
